Tuesday, March 31

Chocolate Chip Pancakes

These are great recipes to try out while we're all on break :)!
  • 4 tablespoons (1/2 stick) unsalted butter
  • 1 cup whole, 2 percent fat, or 1 percent fat milk
  • 1 1/4 cups flour
  • 1 tablespoon sugar
  • 4 teaspoons baking powder
  • 3/4 teaspoon salt
  • 2 eggs
  • 6 ounces semisweet chocolate chips, or less to taste
  • Butter (for cooking)

In a small saucepan, combine the butter and milk. Place over low heat just until warm and the butter is melted. Let cool slightly. In a bowl, combine the flour, sugar, baking powder, and salt; mix well.

In a large bowl, whisk the eggs with a fork. Whisk in the milk mixture. Add the dry ingredients and mix just until barely blended. Add the chocolate chips and mix.

Heat a griddle or large skillet (nonstick works best) over medium heat. Add about 1 teaspoon of butter and melt until bubbly. Ladle 3 tablespoons of batter for each pancake onto the hot surface and cook until bubbly on the top and golden brown on the bottom. Turn and cook until golden brown on the other side, about 30 seconds more. Repeat until all the batter is used up.

Serve these hot, and eat them with your favorite toppings - syrup, butter, whipped cream, powdered sugar, or (the ever-present healthy option...) fruit.

The Chocolate Chronicles
photocredit: associatedcontent.com

Monday, March 30

Chocolate Chip Cookie Cake!

This is a pretty uncommon dessert (I haven't seen it too much when it's in these layers), but it's absolutely delicious and it works great for parties, too. This recipe is easier than it looks, trust me.

Ingredients:
  • 4 cups all-purpose flour
  • 1 1/2 teaspoons baking soda
  • 1 1/2 teaspoons salt
  • 6 tablespoons unsalted butter, softened
  • 1 1/2 cups packed light brown sugar
  • 3/4 cup granulated sugar
  • 3 teaspoons pure vanilla extract
  • 2 large eggs, plus 2 egg yolks
  • 3/4 cup heavy cream
  • 3 cups semisweet chocolate chips
  • 40 ounces (5 packages) cream cheese, room temperature - I'd recommend cutting this down to
  • 1/2 cup confectioners' sugar
  1. Preheat oven to 350 degrees. Whisk the flour, baking soda, and salt in a medium bowl. Put the butter and brown and granulated sugars into a mixer bowl; mix on medium until pale and fluffy. Mix in vanilla, eggs, and yolks. Reduce speed to low, and add the flour mixture in 2 batches, alternating with the cream. Afterward, stir in chocolate chips with a rubber spatula.
  2. For each of the 5 layers, drop one level cup batter onto center of a baking sheet lined with parchment (keep unbaked dough refrigerated). Using a small offset spatula, spread into an 8-inch circle. Bake until edges are pale golden brown, about 12 minutes. Remove from oven. Use offset spatula to reshape circle. Return to oven; bake until edges are golden brown, 8 to 10 minutes more. Transfer to wire rack; let cool. This can be stored airtight up to 1 day.
  3. Mix cream cheese and confectioners' sugar in clean mixer bowl on medium-high speed until pale and fluffy. Spread onto 4 cookies. Stack cookies, placing an unfrosted cookie on top. Refrigerate until the frosting is set (at least 20 minutes or up to 4 hours). Serve at room temperature.
ENJOY! I hope some of you will try this out, especially since it's break :)

The Chocolate Chronicles
photocredit: marthastewart.com

Friday, March 27

Classic Chocolate Fudge

Here's definitely a timeless chocolate classic - FUDGE. Can't do without this in your cookbook! Here's an awesome recipe for the kind of fudge that you keep in your refrigerator; it also marvelous when you warm it up in the microwave.

Ingredients (makes 25 pieces)
  • 2 ounces 60% Cacao Bittersweet Chocolate Baking Bar
  • 2 cups Semi-Sweet Chocolate Chips
  • 1/2 cup sweetened condensed milk
  • 2 1/2 teaspoons pure vanilla extract
  • 1 cups chopped pecans or walnuts

Line an 8-inch square baking pan with waxed paper. Place chocolate chips, bittersweet chocolate, and sweetened condensed milk in a double boiler over hot, but not boiling, water. Stir the mixture occasionally until the chocolate has melted. Stir in the vanilla extract and nuts. Spread fudge evenly in prepared baking pan. Refrigerate for 2 hours, or until firm. Cut into diamonds or square pieces, and store it in the refrigerator.

Even if you haven't used a double boiler before (it's easier than it sounds), this is one of the simplest fudge recipes. A lot of cookbooks require waiting for the mixture to get to a certain temperature after boiling - usually around 236F - which takes a long time and a lot of patience.

Hopefully some of you will try this during break :) Enjoy!

The Chocolate Chronicles
photocredit: godiva.com

Thursday, March 26

Chocolate Banana Bread

Here's a relatively simple recipe for chocolate bread - make some on the weekend, and eat it (as a yummy alternative to bread) throughout the week! This tastes much better than regular banana bread, trust me - it's awesome that you can add chocolate to so many things. (note: the picture below is for an alternative recipe that works with pecans and walnuts)

Ingredients:
1 1/4 cups all-purpose flour
1 teaspoon baking soda
1/4 cup unsweetened cocoa powder
1/2 cup unsalted butter, softened
1 cup granulated sugar
2 large eggs
3 ripe bananas, mashed
1 teaspoon vanilla extract
1/2 cup sour cream
4 bars (1.5 ounces each) dark chocolate (bittersweet works best; semisweet also) finely chopped

Directions:
  1. Preheat oven to 350°F. Butter bottom and sides of 9 x 5 x 3-inch loaf pan.
  2. In medium bowl, sift together flour, baking soda and cocoa powder.
  3. Beat butter and sugar in mixing bowl 2 minutes or until light, using electric mixer at medium-high speed. Beat in eggs, one at a time, beating well after each addition and scraping down sides of bowl as necessary. Add bananas and vanilla extract at low speed, mixing until combined.
  4. Add flour mixture alternately with sour cream. Add chocolate and blend just for a few seconds. Scrape batter into prepared pan and smooth top. Bake 55-60 minutes or until toothpick inserted in center of bread comes out clean. Cool in pan set on wire rack for 15 minutes. Remove from pan and cool completely on rack.
And there you have it! This is a simple bread recipe, and it's much less fatty than other chocolate indulgences :)

The Chocolate Chronicles
photocredit: delishfood.wordpress.com

Wednesday, March 25

Vegan Chocolate Chip Cookies

Here's a simple recipe for a vegan chocolate dessert (at Richa's request). The recipe doesn't really differ too much from normal chocolate chip cookies (SEE MY FIRST POST!).

(makes almost 2 dozen cookies)
Ingredients **make sure these are all at room temperature - the recipe works much better.
2 cups unbleached flour
2 tsps baking powder
1/2 tsp.salt
2 cups Vegan chocolate chips
1 cup raw sugar
1/2 cup canola or vegetable oil
1 teaspoon vanilla
1/4 cup water – add a little more if the batter is too dry.

Directions:
First, preheat the oven to 350F. In a large bowl mix flour, baking powder, and salt. Add the chocolate chips. Make a well in the center of this, and set aside.

In a medium size bowl mix he vegan sugar and oil. Add the vanilla and the water, and then pour this mixture into the well in the other mixture. Mix this until just blended (don't overmix this). Spoon them out onto cookie sheets and be sure to flatten them out - these cookies won't spread too much because they don't contain any butter. Bake for 5 minutes and then flip the cookies over; then put them back in for another 4-7 minutes.

The cookies are done when they seem a little bit softer then you want them to be (see the March 9th post - "Perfect Chocolate Chip Cookies). Take the cookies out when they're done (usually 10-12 minutes total) and let them sit on the sheets for a few minutes; move them to cooling racks after a while if you want to.

The Chocolate Chronicles
photocredit: hubpages.com

Tuesday, March 24

Chocolate sculptures, revisited

First off - HAPPY NATIONAL CHOCOLATE-COVERED RAISIN DAY! (thanks Daniela)

Next up - here's a compilation of some of the coolest chocolate sculptures (a special thanks to Amiti for showing me quite a few of these). It's amazing how much you can do with chocolate!

Chocolate calculator (just for Harker)


White Chocolate Wii controllers


Chocolate baseball player (SO CUTE)


Chocolate letters


this should be self-explanatory

Chocolate Tool kit


Chocolate Swiss Army Knife (this makes me hungry..)


Chocolate stamps


Chocolate Nikes (MY FAVORITE)


The Chocolate Chronicles
photocredit: toxel.com & links to the rest

Monday, March 23

Easy (and healthy!) Chocolate Parfait

This is a delicious parfait recipe, and it's simple and quick. It takes about 10 minutes to prepare (the recipe below makes 6 individual servings), and it's good to cool in the fridge for about an hour before eating it. This is also refreshingly healthy, because it uses lighter ingredients.

Ingredients
  • 1 package chocolate instant pudding mix
  • 2 cups 1% low-fat milk
  • 1/2 cup light sour cream
  • 1 (8-oz.) container frozen whipped topping, thawed and divided
  • 3/4 cup graham cracker crumbs (4 cracker sheets; you can also use chocolate graham crackers)
  • 1 bar of semisweet chocolate to grate on top (optional, of course)
Directions:
Whisk together the pudding, milk, and sour cream in a bowl until blended and smooth. Fold in 1 1/2 cups of the whipped topping. Take out 6 individual cups or glasses and spoon about 1 tablespoon of graham cracker crumbs into each. Add 1/3 cup of the pudding mixture to each cup, and then repeat these layers by adding the crumbs and the pudding. Top each parfait with the remaining whipped topping, and add the grated chocolate if you like. Cover the cups and chill them for at least an hour.

These are easy to make and great for entertaining, plus they're YUMMY. Go try one of these easy recipes sometime during spring break :)

Stay tuned for some amazing chocolate sculptures tomorrow (yes, better than before)!

The Chocolate Chronicles
photocredit: find.myrecipes.com

Friday, March 20

Chocolate Lava Cake

Chocolate lava cake is something I get almost every time we eat out - it's literally the essence of chocolatey goodness. Here's a recipe you can try out:

Ingredients (makes 6 servings):
1 1/2 bars (6 ounces) Bittersweet Baking Chocolate
2 eggs
1/4 cup heavy cream
1 stick (8 tablespoons) unsalted butter
2 egg yolks (in addition to the 2 eggs)
1/3 cup sugar
1/2 teaspoon vanilla extract
1/4 cup cake flour

Directions:
To make centers, melt 2 ounces of chocolate (1/2 a baking bar) and cream in double boiler. Whisk gently to blend. Refrigerate about 2 hours or until firm. Form into 6 balls; refrigerate until needed.

To make cake, heat oven to 400°F. Spray six 4-ounce ramekins (small ceramic serving bowls) or custard cups with cooking spray. Melt 4 ounces of chocolate (1 baking bar) and butter in double boiler; whisk gently to blend. With an electric mixer, whisk eggs, yolks, sugar, and vanilla on high speed about 5 minutes or until thick and light (mixing a little extra here is okay). Fold melted chocolate mixture and flour into egg mixture until just combined (do not over mix this). Spoon cake batter into ramekins. Place a chocolate ball in the middle of each ramekin.

Bake for about 15 minutes or until cake is firm to the touch. Let it sit out of the oven for about 5 minutes. Run a small, sharp knife around inside of each ramekin, place a plate on top, invert and remove ramekin. Garnish with raspberries, ice cream or whipped cream (see picture for inspiration).

The Chocolate Chronicles
photocredit: thenibble.com

Thursday, March 19

Chocolate Sculptures!

There are a number of things you can do with chocolate, but few have seen what can be sculpted from pure chocolate. Here are a few visuals - enjoy!

thecontaminated.com

www.justscrumptious.co.uk


p6.hostingprod.com
Made by Chef and Pastry Master Alain Roby. The sculpture is 6.4 meters tall and made it into the Guiness Book of World Records.


www.chinadaily.com.cn
Chocolate Festival in Portugal, 2006


lh6.ggpht.com
Chocolate Competition

The Chocolate Chronicles

Wednesday, March 18

Traditional Dark Chocolate Truffles

This is a wonderfully easy recipe for excellent homemade dark truffles; for something more milk-chocolatey (but still essentially dark chocolate) you can use Semisweet chocolate chips, or any chocolate chips with less cacao in them. The bittersweet ones tend to work the best with this recipe.

Granted, the truffle in the photo isn't as elegant as can be, but it's homemade and it's chocolate. What could be better?


(makes 30 truffles)
In
gredients:
2 cups 60% Cacao Bittersweet Chocolate Chips
1/3 cup unsweetened Cocoa, for coating at the end (you can also use 3/4 cup chopped almonds or pecans)
1/3 cup heavy whipping cream
6 tablespoons unsalted butter, cut into small pieces

Directions
  1. In a small saucepan, bring the cream to a simmer; add the butter and stir until melted.
  2. Add the chocolate chips. Stir until they're completely melted and the mixture is smooth. Remove the pan from the heat and pour into a shallow bowl.
  3. Cool, cover, and refrigerate the mixture until firm (at least 2 hours).
  4. Using a melon baller or small spoon, roll the mixture into 1-inch balls. Spread the cocoa (or nuts) in a thick layer on a plate, and roll the truffles through. Enjoy immediately or refrigerate in an airtight container for up to 2 weeks.

DELICIOUS. Homemade truffles, brought to you much easier than you would have thought.

The Chocolate Chronicles
photocredit: teuscher-chocolate.com

Tuesday, March 17

Heaven & a heart attack on the same plate

Cupcakes from Sprinkles ("the original cupcake bakery") have probably set the record for the amount of blissful, tasty goodness that can be packed into a single serving of "cake." I've eaten at Sprinkles only a few times before because it's pretty far from where I live, but I absolutely love their cupcakes. The cake itself is moist and delicious, and the frosting is absolutely indescribable. Their wonderful frosting - thickly coated and really rich, is nevertheless the main contributor to the "heart attack" portion of my title. Though the nutrition facts of Sprinkles cupcakes aren't published (for good reasons), the frosting they put on is super saturated with sugar and, as a result, fat.

Don't be deterred, though; moderation is key when it comes to things like Sprinkles. They recently opened a store in the Stanford Shopping Center, which is the only one in the Bay Area - so it's not as if Sprinkles cupcakes will be tempting you around every corner. I'm no health expert, but I know a lot of people find it more rewarding to work out (especially if it's not part of your daily routine) and then eat something as heavenly as one of these little goodies.

If you haven't eaten Sprinkles before, be sure to try them out sometime. They're a small but rapidly growing chain of stores that sell freshly made cupcakes (and even little ones for your dog!). While they are a little pricey ($3.25 each or $36 for a dozen), it's good to reward yourself once in a while. With over 22 flavors and even boxes of mix you can take home and make yourself, there's sure to be something you like!

The Chocolate Chronicles
photocredit: sprinkles.com

Monday, March 16

Easy Chocolate Fondue

Take a look at those delicious chocolate strawberries staring at you on the right. Click the picture. If those strawberries don't make you... uh, salivate, then I don't know what will. Just think - you could be eating those, right now.

Chocolate fondue is a party favorite, but it's much easier to make than most people think. If you have what's needed, then go ahead and make this recipe even without occasion - you don't need a fountain (if you're not entertaining, it'd be better to half or even take a quarter of the recipe so that you don't have too much extra). The fondue dip is best eaten with some fresh strawberries (hopefully the picture will give you some motivation to make this) or other fruit (bananas, berries, oranges, pineapple); some other choices are hazelnut or almond biscotti, pretzel sticks, big fluffy marshmallows - YUM, cookie pieces, or cubes of pound cake.

Ingredients (makes about a pint):
1/2 pound bittersweet chocolate, coarsely chopped - you can also use semisweet, if you want something a little closer to milk chocolate.
1 cup heavy cream


Directions:
Combine chocolate and cream in a thick-bottomed bowl or pan, set over a pan of barely simmering water (this is also called a double boiler). Stir the mixture occasionally using a wooden spoon, until all the chocolate is melted and the mixture is smooth. It's best to divide the finished dip into separate bowls - and serve it immediately with accompaniments.

This recipe is so unbelievably easy - enjoy!

The Chocolate Chronicles
photocredit: nuzailah.wordpress.com

Friday, March 13

Semi-homemade recipes & quick tips

There are so many times when you've promised to make something for a club or class bake sale, or it's your best friend's birthday the next day and you have absolutely no idea what to do. Instead of buying something from the grocery store (lamesauce), take a 15 minute break and make something at least semi-homemade and much more delicious. These recipes are simple and absolutely flawless - they come out perfect every time (trust me, I've made them enough times). Completely homemade recipes are obviously much healthier and taste more natural (see previous posts!), but here are some other options when you're pressed for time, as we always are.
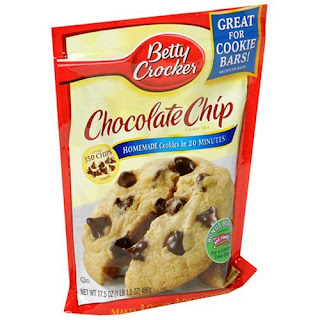
Betty Crocker Chocolate Chip Cookie Mix
This recipe is done very quickly, and it requires little or no expertise. All you need is an egg and a stick of butter - blend those together and then add in the mix from the packet. It says to have butter at room temperature, but I recommend microwaving it a little bit even then (or for two 8 or 9 second intervals if it's straight from the fridge), because the butter doesn't mix well with the egg. Even if the two are very lumpy & clumpy when mixed and you can't seem to blend them anymore - no worries, just add in the mix; the cookies will taste and look exactly the same. Also - don't worry about shaping the cookies. You can leave ugly little lumps on the cookie sheet (I recommend parchment paper) because they cookies will spread out perfectly into nice little circles just from the heat (unlike sugar cookies). Be sure to leave lots of room for the cookies to spread, and bake them on the lower end of the recommended time - otherwise they will be hard by the next day. Enjoy - these cookies turn out beautifully, and are absolutely indescribable when fresh out of the oven (...though still not as delicious as the recipe for "Perfect Chocolate Chip Cookies" from March 9's post!)

Ghirardelli
Double Chocolate Brownie Mix

Because brownies require more time in the oven than cookies (40 minutes vs. 8-10), these may seem like a longer process, but in reality it doesn't take too much time to prepare. Add 1/3 cup each of water and vegetable oil (again, all the instructions are detailed on the back) and blend those together with an egg. Because you don't need to add butter in this recipe, I find that the ingredients mix well together (use a large rubber spatula to blend in the mix from the box) and never have any lumps, except for the chocolate chips. These brownies come out moist and delicious, and are delicious with ice cream (see previous post for tips on how to enjoy brownies, as well as a better - and longer - recipe!).

Ghirardelli Hot Cocoa - Double Chocolate
Nestle Hot Cocoa Mix - Mini Marshmallows
Both of these are heavenly hot chocolate mixes and quite popular as well, so be sure to buy some and keep them handy at home. The Ghirardelli mix comes in a cylindrical box, and the Nestle comes in 6 individual packets to a box (perfect to keep in the kitchen at work for everyone to enjoy - or in your locker at school if hot water is available, and also excellent for traveling). The Ghirardelli mix calls for hot milk, and the Nestle mix works with both water and milk. To make the hot chocolate richer, milk is obviously the better choice, but sometimes it's good to mix a portion water and a portion of milk, to keep it a little healthier - and you can't taste the difference!
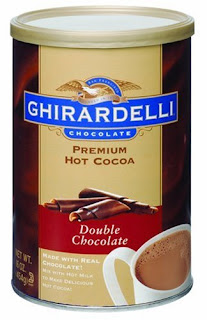
Of course, all of these 4 recipes come in many other mix "flavors," but the ones above are my favorite. All of these are available at any local grocery store, along with various other types. Again, homemade recipes are much less precessed, more natural, healthier and much tastier - but don't resort to buying baked goods from the supermarket when you can make something fresher right at home. Be sure to keep some of the recipes above handy, so when you're pressed for time or just longing for something semi-homemade, you can whip up one of these.

The Chocolate Chronicles
photocredit1: savingwithshellie.com
photocredit2: shopniac.com

Thursday, March 12

Recipe: Blissful Brownies

I find that these brownies are perhaps the best homemade creations I have ever eaten. They taste best when they're hot, with some cold ice cream and pecan pieces on top - delicious. See below for more ideas.

Ingredients
4 ounces (1 stick) salted butter, at room temperature
1½ cups granulated sugar
2 large eggs
½ cup & 1 tablespoon unsweetened cocoa
1 cup & 2 tablespoons all-purpose flour
½ teaspoon baking powder
¼ teaspoon salt
1 tablespoon water
1 teaspoon vanilla
¾ cup walnuts, in small pieces (optional)

TIP: In step 4 below, beat the mixture for an extra 2 minutes on medium speed in order to make the brownies fluffier and tastier.

  1. In a large bowl, using a mixer, beat the butter for half a minute or so; then add the sugar and beat until the mixture is well blended together.
  2. Beat in the eggs.
  3. Measure and then sift the required amount of cocoa. Add this in and mix until the batter is smooth.
  4. Thoroughly blend together the flour, baking powder and salt; add them to the mixing bowl and beat at medium speed.
  5. Add the water and vanilla and mix them in.
  6. Gently blend in the walnuts (only if you want). The dough will be a bit stiff and sticky, which is all right.
  7. Pour the dough into a greased baking pan, 8-inch or something similar. Grease the pan with butter, not olive oil if possible - the smell tends to linger. After, dust the pan with flour and tap out the excess, to make the brownies easier to remove at the end.
TIP: Instead of using a spatula or your fingers to smooth the batter down into the baking pan, hold two sides firmly in your hands and rest the pan on a counter top. Shake it vigorously back and forth, up and down; the batter will move to the corners and even itself out quickly.

Bake the brownies for 30 to 40 minutes or until the top is set and a toothpick inserted in the center comes out clean, without any batter on it. Wait at least an hour before cutting the brownies, otherwise the cuts won't come out clean. After you've eaten a few and treated your friends or family, cover the pan with aluminum foil and store them in the oven or the pantry.

The brownies will taste fine for a couple weeks max, but they taste best when fresh from the oven, of course. If you still have the brownies in your pan after a few days, a good idea is to warm up a brownie or two in the microwave (cover the plate with a moist - but not soaking - paper towel) for 10-15 seconds, and then eat it with some cold ice cream. YUM :)

The Chocolate Chronicles
photocredit1: candyaddict.com
photocredit2: piesandbass.wordpess.com

Wednesday, March 11

Chocolate 101: dark, milk, and white

We see it in the store, in the windows of See's or Godiva (more on that later), and in little kids' Halloween baskets. Most of us probably know that the darker the chocolate, the more "real chocolate" there is inside - and there's even debate as to whether white chocolate is true chocolate. In order to differentiate the different types (a must-know for any chocolate lover), we need to know where chocolate actually comes from. Here's an abridged version of the real chocolate production process:

  1. Chocolate comes from the cacao bean, which grows on trees in large pods. Most (almost 2/3) of the world's cacao supply comes from Western Africa; the most common cacao bean (of 3 types) is called forastero.
  2. The cacao pods (typically orange or similar in color) are harvested when completely ripe and then left to ferment, giving the beans the chocolate flavor we all love.
  3. After drying, cleaning, and roasting the beans, the central "nibs" of the cacao bean are extracted from their white shells and ground and liquefied into a pure liquid chocolate, known as chocolate liquor or unsweetened chocolate.
Some other useful things to know - cocoa butter is a pale yellow or off-white natural fat with a mild chocolate flavor, taken from the cacao been; cocoa powder is the nonfat portion of chocolate, which is generally bitter in taste and reddish brown in color - it's essentially powdered chocolate liquor without any fat content.

Though the different chocolates aren't as black and white (or should I say, brown and white) as the photo above, here's a quick rundown of the different types of chocolate and their basic ingredients & differences.

Unsweetened chocolate
is pure chocolate liquor, also known as baking chocolate.

Dark chocolate is produced by adding cocoa butter and sugar to chocolate liquor, and is the only chocolate without milk content. (Bittersweet chocolate is chocolate liquor with a very low sugar content - typically one third as much as dark chocolate, and semisweet chocolate has about half as much. Both are used for baking.)

Milk chocolate is made by adding cocoa butter, sugar, and milk powder (or condensed milk) to chocolate liquor - the use of condensed milk was first used in the 1800s by Henri Nestlé.

White chocolate - a type of couverture (chocolate rich in cocoa butter), white chocolate is made of sugar, cocoa butter, and milk - no chocolate liquor or cocoa solids.

As to the health content of dark chocolate - soon to come!

The Chocolate Chronicles
photocredit1: cacaolatino.com
photocredit2: chocolatecantina.com